Using the eSuite SDK
The eSuite SDK can be obtained, and then installed and tested on a local machine.
Acquire Credentials
A client's networked interactions with eSuite are based on the passing of client specific credentials, provided by eSuite Customer Support. These include:
- A numeric Client ID (for instance, 433).
- A password, often referred to the client's API Password (for instance, Ac9*237sf).
- A 32-digit code, known as the client's X-TokenId (for instance, 9E9F3BEF7D814538AB75AD43CC6D651B).
Contact your account representative to acquire these. For more detailed information, see the section Understanding Authentication.
Register an Origin, for Testing Purposes
An origin is the address of the website at which the eSuite SDK runs. Along with the security token and credentials addressed in the previous section, the origin must be passed as a header in each client-side call to eSuite; and must be recognised by eSuite, for the communication to be successful. A client may use multiple origins: each must be registered with eSuite.
Since initial testing of the eSuite SDK is likely to occur on the machine and website of an individual user, to whom the role of tester has been delegated by the client; the address of this private website must itself be registered as a client origin, with eSuite. Please contact the customer support team and they will add this address to the token you were supplied with in your getting started email.
The instructions given below generally assume that the address and port number selected are the defaults for the machine; and that therefore, http://localhost has been registered as origin. However, if the website is to be at a different location on the user's machine, an alternative port number or IP address must be selected and configured: for example, http://localhost:72, or http://125.0.0.5. Then, this information must be registered with eSuite. For more information, see Select Port Number and IP Address, below (which section, indeed, you may wish to consult prior to your selection and registration of an origin).
Obtain and Install the eSuite SDK
For the latest version of the SDK and it's release notes please follow this link
Once downloaded, open it and extract the contents into a local folder. Note that this folder is recommended to be under the C drive, so as to avoid permission problems. The folder itself should contain the esuitedemo folder, provided with the download. For example, C:\Projects\eSuiteSDK should contain the folder esuitedemo.
Determine whether IIS is Installed on your Machine
To set up the SDK, you must use Internet Information Services (IIS); which constitute Windows' principal facility for the definition and management of websites. The IIS management tool may or may not already be installed on your machine. Therefore, to determine whether IIS is installed, proceed as follows:
Windows 7
Click the Start button. When the search input field appears, type IIS into it. If Internet Information Services (IIS) Manager appears in the result list, this means that IIS is indeed installed; in which case, proceed directly to the section Select Port Number and IP Address, below.
Windows 8.x and 10
Hold the Windows key, and press S. When the search input field appears, type IIS into it. If Internet Information Services (IIS) Manager appears in the result list, this means that IIS is indeed installed; in which case, proceed directly to the section Select Port Number and IP Address, below.
Install IIS
If you determine that IIS is not currently installed on your system, you must install it. Proceed as follows:
- On Windows 7, follow the instructions provided at https://technet.microsoft.com/en-us/library/cc725762(v=ws.11).aspx.
- On Windows 8.x and 10, follow the instructions provided at http://social.technet.microsoft.com/wiki/contents/articles/29312.installing-iis-8-on-windows-8-1.aspx.
Select Port Number and IP Address
To establish an eSuite SDK website by means of IIS, you must specify a unique combination of IP address and port number, as the website's location. For a given IP address, the port number can be employed by only one service at a time.
On installation, IIS creates a default website; occupying a default port, which is number 80. However, this is the port you are expected to use for the eSuite SDK website. Therefore, in order to prevent a conflict, you must do one of the following:
- Remove the default website. If you have just installed IIS for the first time, this is likely the best option; since the default website is currently not being used for any significant purpose. This allows you to register http://localhost with eSuite, as the origin for your eSuite SDK-testing.For this procedure, see the subsection Remove the Default Website, below.
- Deactivate the default website. The IIS Manager tool allows you to switch websites on and off dynamically; therefore, you can establish multiple websites on the same port, and at any given time, keeping all switched off except one. The may be a good option if port 80 on your machine is supporting a valuable website that you do not wish to lose; but which can be temporarily deactivated. This allows you to register http://localhost with eSuite, as the origin for your eSuite SDK testing.For this procedure, see the subsection Deactivate the Default WebSite, below.
- Establish the eSuite SDK website either on a port number other than 80; or on an IP address other than the default. This may be the best option if you are running multiple websites that you do not wish to remove or deactivate; and if you are familiar with IIS and Windows administration, or have access to administrative support. Note, however, that using a different port number or IP address requires that an origin other than http://localhost must be registered by you with eSuite.If this is your chosen option, proceed directly to the section Set Up the eSuite SDK WebSite, where further information is provided.
Remove the Default Website
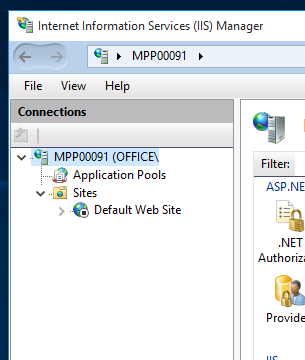
If you decide to remove the default website, bring up the IIS management tool, as described above. Access the left-hand panel, named Connections. Click on, in turn, the top node, and then, under it, the Sites node. The Default Web Site now appears.
Right-click on the name of the default website, to display the pull down menu:
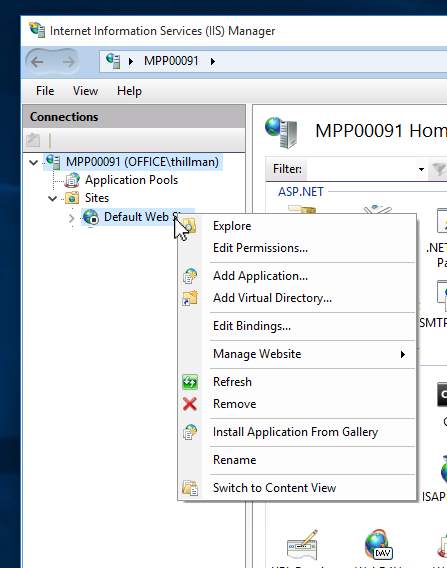
Select the Remove option. This removes the default website. No sub-node now appears under Sites, in the navigation panel.
Now, proceed to the section Set Up the eSuite SDK Website, below.
Deactivate the Default Website
If you wish to deactivate the default website, bring up the IIS management tool, as described above. Access the left-hand panel, named Connections. Click on, in turn, the top node, and then, under it, the Sites node. The Default Web Site now appears. Click on it. Then, access the right-hand panel, which appears as follows:
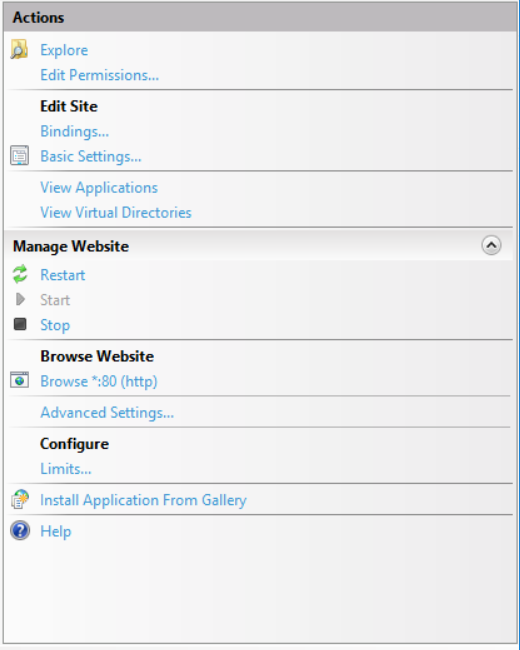
In this panel, under the heading Manage Website, appear the Start, Restart, and Stop controls for the site. To deactivate the site, select Stop.
Repeat this procedure, if necessary, for any other website that is currently allocated to port 80. Then, proceed to the section Set Up the eSuite SDK Web-Site, below.
Set Up the eSuite SDK Web-Site
Open the IIS management tool. To do this, search for IIS (as described above), and select the tool from the search results. You can also access it by means of the Administrative Tools option, within the Windows Control Panel.
The IIS management tool, in its initial appearance, features three panels:
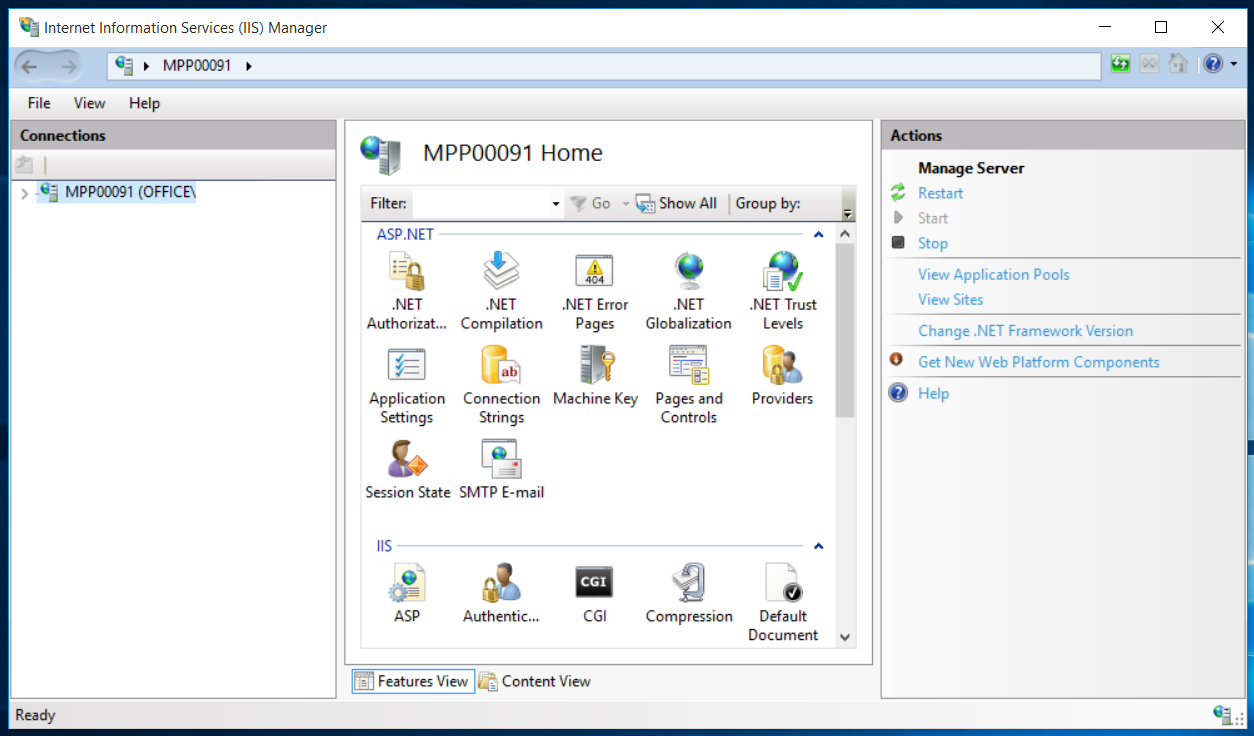
The leftmost panel is entitled Connections, and features a folder hierarchy, the nodes of which can be expanded, by clicking on the rightward pointing arrow, to the left of each node name. Right-click on the topmost node, to display a pull down menu, as follows:
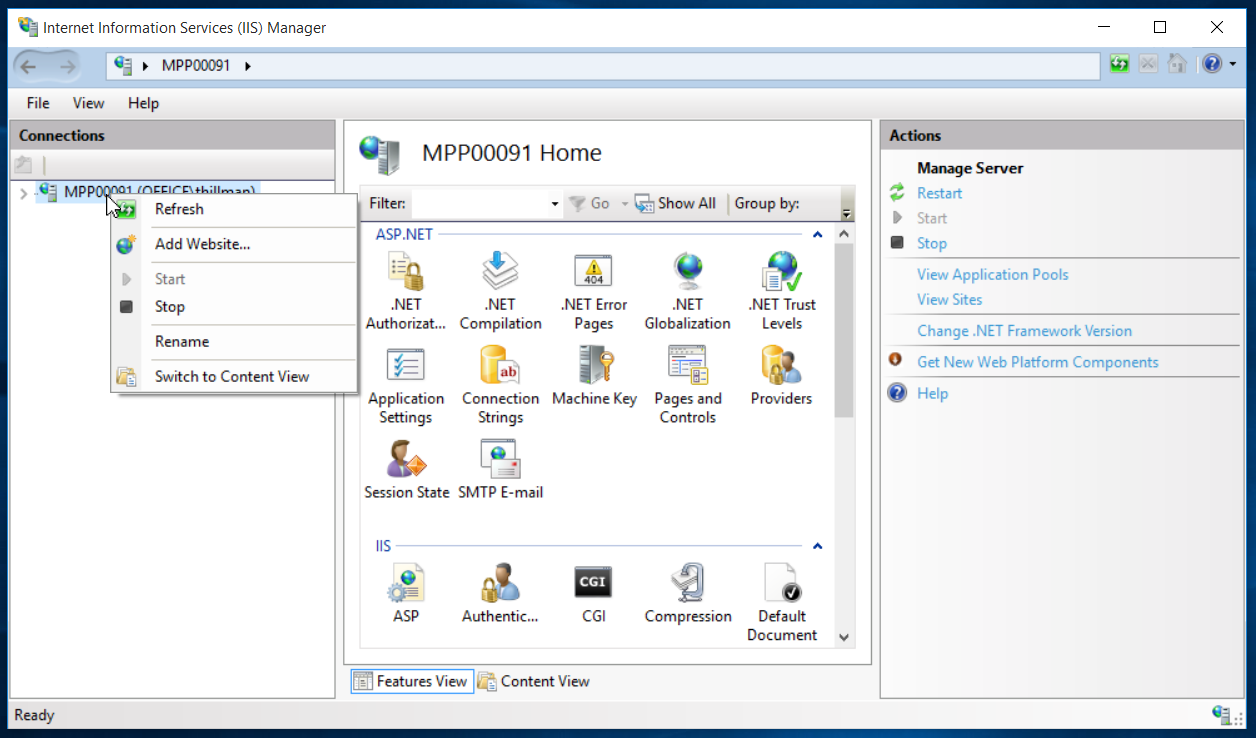
Select Add Website from the menu. This brings up the corresponding dialogue:
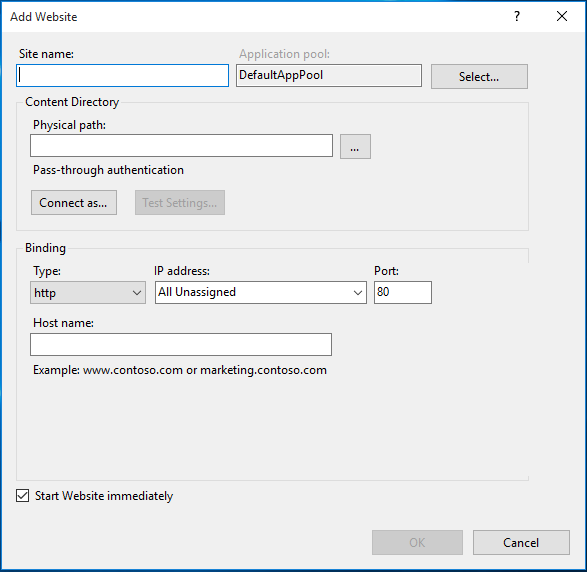
Type a suitable site-name into the Site name field (for example, eSuiteSDK). Then, click the ellipsis button at the right of the Physical path field, and locate the folder in which you saved the extracted eSuite SDK.
Leave the Http binding as http. (This is suitable for test mode. Note, however, that a production environment will require https.)
Next, based on the IP address and port number you have selected for the eSuite SDK, proceed as follows:
- If you are (as is recommended) using the default IP address and port number, leave the IP address as All Unassigned; and leave the adjacent port number as 80.
- If you are using a different port number, with the default IP address; change the adjacent port number from 80 to the number you have chosen. Note that if you do this, you must ensure that the port number you specify is not being used either by another web site, or any other process. Then, you must register http://localhost:XX with eSuite as your origin for testing, where XX is the chosen port number.
- If you are using a different IP address, potentially with a different port number; as administrator, with the dialogue still open, simultaneously access the file C:\Windows\System32\drivers\etc\hosts in a suitable editor. Then, add the chosen IP address, followed by a suitable host name, at the foot of the file. For example: 127.0.0.11 my.test.com. Then, save the file.Return to the dialogue; and add the chosen IP address to the IP address field; then, if necessary, add a port number other than 80 (say, 345) to the adjacent port-number field.You must now register your custom origin with eSuite. This might be specified as http://127.0.0.11:345, or http://my.test.com:345.
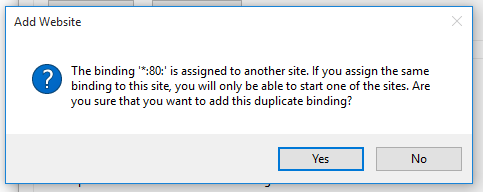
- You may leave the Host name field blank. Leave Start website immediately checked. Finally, click on the OK button.If you have bound the eSuite SDK website to port 80, a warning notification is now displayed (note that this is displayed whether or not you have already removed or deactivated other websites bound to port 80):
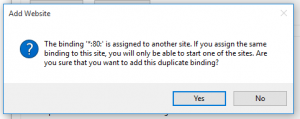
 Click on Yes.At this point, provided that your website has been established on a port unoccupied by any other currently running process, your website starts running.
Note that if you have chosen to create a duplicate binding, whereby the eSuite SDK website shares a port number with another process, and that process is currently running; you must now stop that process, and manually start the eSuite SDK website by means of the Start button in the Manage website panel.
Configure eSuite SDK Connectivity
To configure eSuite SDK connectivity with eSuite, navigate to the folder esuitedemo\modules\mpp\core. Then, bring up the file config.js in an editor.
Within this file, four values must be specified, as follows:
- rootRestServiceUrl: unless you have made an alternative arrangement with eSuite, the value should be specified as https://uat.mppglobal.com/interface/Mpp/eDeveloper/v8/eDeveloper.json.svc/.
- threeDSecureRequestUrl: unless you have made an alternative arrangement with eSuite, the value should be specified as https://paymentsuat.mppglobal.com/interface/Mpp/ThreeDSecure/ThreeDSecureReq.aspx.
- The unique X-TokenId provided to you by eSuite. In practice, this should be the only element that needss changing and will have been communicated to you. If you do not have an X-Token or are having issues, please contact the Customer Support team.
Testing a payment
Now that your SDK is configured you can perform a test purchase using your locally hosted pages that will communicate with the eSuite UAT environment.
Go to http://localhost/esuitedemo/apps/payment/#!/subscription-selection where the services configured against your client ID will be displayed. If no services show here, log into eSuite HQ and create some.
Select a service, create an account (if you haven’t already done so) and use the card details below for the payment step. When creating your account, note that eSuite UAT will only send e-mails to a limited number of domains – if you’d like to receive e-mails, you can use the “@mailinator.com domain.
Please note, these payment details can be used when performing test payments, it will be useful to keep note of them.
• Card type: Visa
• Card number: 4111111111111111 (a four, followed by fifteen ones)
• Expiry date: Any future date.
• Security code: 123Once payment is complete, a confirmation page is displayed.
Performing Self Care
Self care allows a consumer to log in, view their details and manage their account. They can see and manage their subscriptions, view past orders, manage payment details and maintain their personal details.
To access the account you have created, open a browser, and navigate to the following URL: http://localhost/esuitedemo/apps/management/#!/login. Then, log in, using the email address and password you specified when creating the account. A welcome page allows you to view (and in some cases edit) account information under Personal Details, Payment Details, Order History, and Subscriptions.